
Vert.x 3 real time web apps
One of the interesting features of Vert.x is the SockJS event bus bridge. This piece of software allows external applications to communicate with Vert.x event bus using Websockets and if your browser does not support it then it gracefully degrades to pooling AJAX calls.
WebSockets bring a new level of interaction to the web, they really bring real time to web applications due to the fact that its communication model is bi-directional in contrast to the traditional HTTP model where a client can initiate a data request to a server but not the other way around.
In this small post I will demonstrate how you can create a simple collaborative drawing app. The idea is simple, all users that open the app will be be presented with a empty canvas and what they draw or is drawn on other canvas is shared in real time on their screen.
For the sake of simplicity and making this post light there is no security involved so, everyone is free to listen to what is being drawn, however the external application has limited read write access to a single address on Vert.x event bus, ensuring that other services running on the cluster will not be exposed.
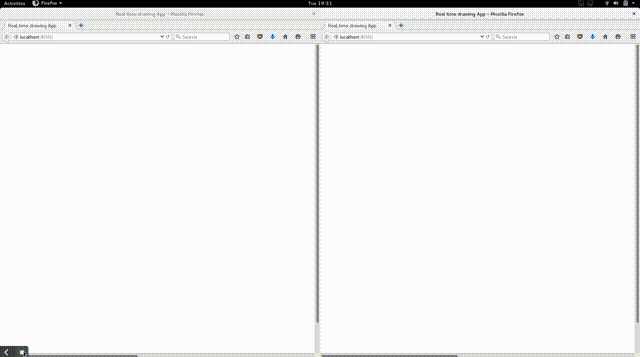
This is what you should expect to see:
Bootstrap a project
If you followed the previous series on Vert.x development, you saw that Java and Maven were the main topic, since Vert.x is polyglot I will focus on JavaScript and NPM as my programming language and package management tool.
With NPM start by creating a package.json, in order to do this we should run:
npm init
This will present a selection of questions and in the end you should have a basic package.json file. This
configuration is very basic so you need to add a dependency to Vert.x so
you can run the application. You can add it to the dependencies property and it should look more or less like this:
{
  "name": "draw",
  "private": true,
  "dependencies": {
    "vertx3-full": "3.0.0-1"
  },
  "scripts": {
    "start": "vertx run server.js"
  },
  "version": "1.0.0",
  "main": "server.js",
  "devDependencies": {},
  "author": "",
  "license": "ISC",
  "description": "A Real Time Drawing App"
}
If you do not know why there is the dependency on vertx3-full or why the added scripts property please check the older blog post about it.
Project Structure
This post has no preference over project structure, so if you do not agree with the structure used here feel free to use what you feel best. For this example I will keep it to:
├── package.json
├── server.js
└── webroot
  ├── assets
  │   └── js
  │     ├── script.js
  │     └── vertxbus.js
  └── index.html

3 directories, 5 files
As you can imagine server.js will be our Vert.x application and everything under webroot will be the client
application.
The client application is not really Vert.x specific and could in theory be used by any other framework so I will go lightly over its code.
Client Application
Our application main entry point is as one can expect index.html. In the index file define the following HTML:
<!DOCTYPE html>
<html>
<head>
  <meta charset="utf-8"/>
  <title>Real time drawing App</title>
  <!--[if lt IE 9]>
  <script src="http://html5shiv.googlecode.com/svn/trunk/html5.js"></script>
  <![endif]-->
</head>

<body>
<canvas id="paper" width="1900" height="1000">
  Your browser needs to support canvas for this to work!
</canvas>

<!-- JavaScript includes. -->
<script src="http://code.jquery.com/jquery-1.8.0.min.js"></script>
<script src="//cdn.jsdelivr.net/sockjs/0.3.4/sockjs.min.js"></script>
<script src='assets/js/vertxbus.js'></script>
<script src="assets/js/script.js"></script>

</body>
</html>
As I previously wrote, the idea is to keep it as simple as possible so it is all about having a canvas element and a
application main script script.js. All the rest are files served by CDNs that provide common web application
libraries such as jQuery, HTML5 shim for older browsers, SockJS client and vertxbus bridge.
The main code is on script.js file:
$(function () {

  // This demo depends on the canvas element
  if (!('getContext' in document.createElement('canvas'))) {
    alert('Sorry, it looks like your browser does not support canvas!');
    return false;
  }

  var doc = $(document),
    canvas = $('#paper'),
    ctx = canvas[0].getContext('2d');

  // Generate an unique ID
  var id = Math.round($.now() * Math.random());

  // A flag for drawing activity
  var drawing = false;

  var clients = {};
  // create a event bus bridge to the server that served this file
  var eb = new vertx.EventBus(
      window.location.protocol + '//' + window.location.hostname + ':' + window.location.port + '/eventbus');

  eb.onopen = function () {
    // listen to draw events
    eb.registerHandler('draw', function (data) {
      // Is the user drawing?
      if (data.drawing && clients[data.id]) {

        // Draw a line on the canvas. clients[data.id] holds
        // the previous position of this user's mouse pointer

        drawLine(clients[data.id].x, clients[data.id].y, data.x, data.y);
      }

      // Saving the current client state
      clients[data.id] = data;
      clients[data.id].updated = $.now();
    });
  };

  var prev = {};

  canvas.on('mousedown', function (e) {
    e.preventDefault();
    drawing = true;
    prev.x = e.pageX;
    prev.y = e.pageY;
  });

  doc.bind('mouseup mouseleave', function () {
    drawing = false;
  });

  var lastEmit = $.now();

  doc.on('mousemove', function (e) {
    if ($.now() - lastEmit > 30) {
      eb.publish('draw', {
        'x': e.pageX,
        'y': e.pageY,
        'drawing': drawing,
        'id': id
      });
      lastEmit = $.now();
    }

    // Draw a line for the current user's movement, as it is
    // not received in the eventbus

    if (drawing) {

      drawLine(prev.x, prev.y, e.pageX, e.pageY);

      prev.x = e.pageX;
      prev.y = e.pageY;
    }
  });

  // Remove inactive clients after 10 seconds of inactivity
  setInterval(function () {

    for (var ident in clients) {
      if (clients.hasOwnProperty(ident)) {
        if ($.now() - clients[ident].updated > 10000) {
          // Last update was more than 10 seconds ago.
          // This user has probably closed the page
          delete clients[ident];
        }
      }
    }

  }, 10000);

  function drawLine(fromx, fromy, tox, toy) {
    ctx.moveTo(fromx, fromy);
    ctx.lineTo(tox, toy);
    ctx.stroke();
  }

});
The most important part in this code is all the code related to eb. The variable eb is our bridge to the event
bus, Start by creating a bridge using the vertx.EventBus object and define where to connect, using the details
of the current window location.
Then add a onopen listener that will subscribe to the address draw on the event bus so it can listen to all
messages regarding drawing and perform the drawing actions. Since listening is not enough I also add a mouse listener
to the document so when it moves it publishes events to the draw address.
Note that I am using publish and not send, the reason should be obvious, I want everyone to know this users mouse
movements, I am not interested on sending the events to just a single user. You can see now that if you want to have
a drawing app in a one on one user basis then instead of publish() you should use send().
Server Application
The server code is quite straight forward, all you need is:
var Router = require("vertx-web-js/router");
var SockJSHandler = require("vertx-web-js/sock_js_handler");
var StaticHandler = require("vertx-web-js/static_handler");

var router = Router.router(vertx);

// Allow outbound traffic to the draw address

var options = {
  "outboundPermitteds" : [{"address" : "draw"}],
  "inboundPermitteds" :  [{"address" : "draw"}]
};

router.route("/eventbus/*").handler(SockJSHandler.create(vertx).bridge(options).handle);

// Serve the static resources
router.route().handler(StaticHandler.create().handle);

vertx.createHttpServer().requestHandler(router.accept).listen(8080);
We start with the usual imports, we import a reference to the Router object and a couple of helper handlers
SockJSHandler and StaticHandler. As their names should tell you one handler will be responsible to handle all
SockJS data and the other all HTTP file serving requests.
We then add then to a router and start a HTTP server that will handle all incoming request using the handler accept
function. Finally we listen on port 8080 and we are ready.
Note that there is a options object where a couple of properties are defined outbound/inbound permitted addresses.
Without this configuration the external application will not be allowed to connect to the vert.x bus, in fact the
default configuration of the SockJSHandler is deny all. So you must specify explicitly which address are allowed to
receive messages from SockJS and which ones are allowed to send/publish to SockJS.
Now you can start your application, don’t forget to install the dependencies for the first time:
npm install
And then run the application:
npm start
If you now open 2 browser windows you will be able to draw nice pictures and see the drawing showing in “real time” on the other window, if you then draw on the second you should get the mirror effect on the first window.
Have fun!

Next post
Writing secure Vert.x Web apps

This is a starting guide for securing Vert.x web applications. Standard rules and practices apply to Vert.x apps as if they would to any other web framework.
Read morePrevious post
Unit and Integration Tests

Let’s refresh our mind about what we developed so far in the introduction to vert.x series. We forgot an important task. We didn’t test the API.
Read moreRelated posts
Unit and Integration Tests
Let’s refresh our mind about what we developed so far in the introduction to vert.x series. We forgot an important task. We didn’t test the API.
Read moreCombine vert.x and mongo to build a giant
This blog post is part of the introduction to Vert.x series. We are now going to replace this JDBC client by the vertx-mongo-client, and thus connect to a Mongo database.
Read moreUsing the asynchronous SQL client
Finally, back... This post is the fifth post of the introduction to vert.x blog series, after a not-that-small break. In this post we are going to see how we can use JDBC in a vert.x application.
Read more